Brandy524
-
Posts
1,164 -
Joined
-
Last visited
Everything posted by Brandy524
-
Thanks, Eric! I'd make you a cake if you weren't so far away! I actually have thought of opening my own business, and maybe one day I will. But my husband is in school right now, so it's not the best time for a new business venture. Maybe when he gets out of school. I am starting to take orders for friends and family, hence the Twilight cake for a friend from high school. Hopefully, one day, it will turn into something bigger. For now I'm just having fun doing a few here and there!
-
^ He is right, though, his legs are a little on the short side. But it was my first attempt at anything like this. And thank you! I think the Scarecrow turned out the best, even though he was the one I was most worried about.
-
^ Ha ha...it's okay, I know you didn't! And thanks! It's for a 3-year-old, so she's really not going to care.
-
Now you have me paranoid about the Tin Man's legs! I'll probably have to go fix them. I didn't even pay any attention to that.
-
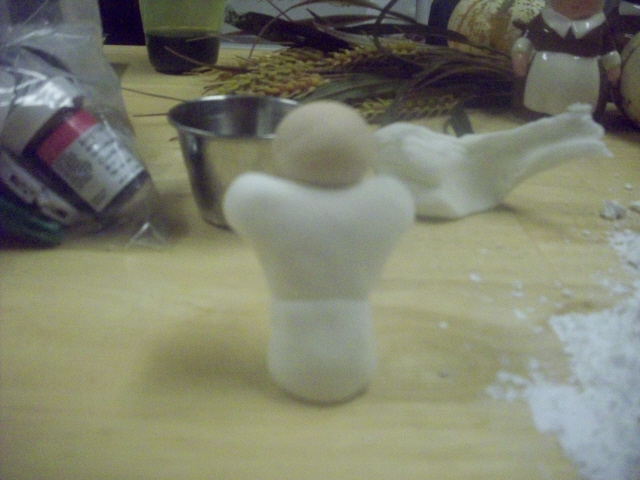
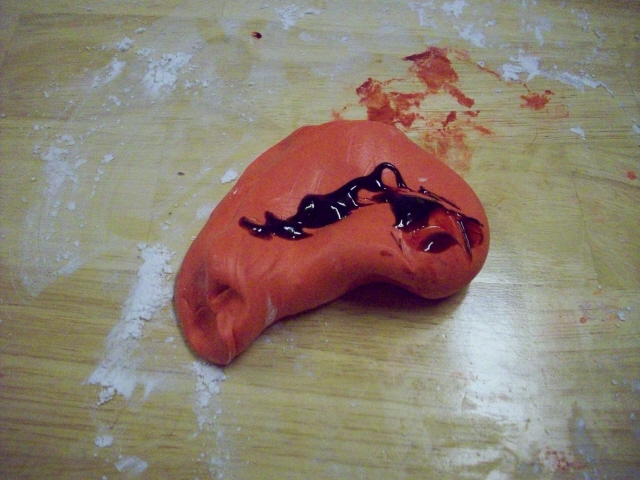
The girls picked the Scarecrow as the next character to make last night. He did prove to be the most difficult one so far. I had to color darker colors for him which took longer. And he did not want to stay together! Anyway, here goes... And the three finished ones together. I think the Scarecrow is my favorite thus far. The lion will be tonight. But I don't know if I'll get an update done until Monday. You see, I'm taking off work tomorrow to go Christmas shopping, so I won't get the lion update done tomorrow, and I don't usually even get on the internet on the weekends. So you'll probably have to wait until Monday to get one huge update. And speaking of feet, here they are in place. Almost there. I thought his legs looked a little too long, so I cut them off a little before I added feet. Tada! See, told you. I had to brace his arms with toothpicks. They would not stay on for anything! Notice the two pilgrim salt and pepper shakers? Yeah, I had them backed up against his arms to help hold them on. I just moved them to take a picture. No, this is not what color is head is going to be in the end. Keep reading... Torso added. The dark green was hard to achieve! I had to mix a little brown, a little black and a little green to get this color. Legs...they look kind of gross, don't they?

-
^ Thank you! And thank you all for reading. I'm honored!
-
Thank you!!
-
 Looks like a great time was had by all! I haven't met any TPR people as of yet, but I hope the Big Mike Road Show will be my first time to meet anyone! Maybe next year the road show will make a stop down south.
 -
^ Thanks!! Let's get right into it. I let the girls vote on which character they wanted me to make last night and they picked Dorothy. She actually wasn't as hard to make as I had anticipated. Finished Dorothy, Toto, and Tinman. I accidentally made Dorothy a little bit bigger than the Tinman. Oops. Oh well. I'll put him a little farther back on the cake to make it look like he's in the distance. Yeah, that'll work. Only two characters left. I'm not sure which one we'll be doing tonight. The girls will get to decide. I guess it'll be a surprise to you all in the morning! Toto with his paint on. I mentioned the other day to the girls that I was going to paint Toto black instead of coloring fondant black, and they were so kind to inform me that Toto is not black, he's brown. We watched the movie, and of course, they were right. Toto is brown. Do not question two preschoolers on their favorite movie. They remember more than you may think! A very blurry, unpainted Toto. My husband figured out why all my pictures were coming out blurry: there was a smudge on the lens. I didn't clean it until this morning, so the pictures I took last night are all kind of blurry. But the ones I do tonight should be better. Of course, I can't forget the ruby slippers! Yay, she has arms and legs now! She's really taking shape a lot easier than I thought she would. Dress is on. I didn't document coloring all the different colors of fondant, because really, if you've seen it once, you've seen it a thousand times. She grew hair very fast! Head and torso assembled. The finished flesh...yuck. A few dots of brown coloring to make flesh-colored fondant.
-
Is the football thing still going on? I guess I'm falling behind on my duties! I have no idea! Oh, well, just in case... Big Mike, he's number one, And he's here to show it. Big Mike, he's number one And you should already know it!
-
Since Cammy's birthday party is Sunday, I figured I need to get started on the characters for her cake. I'm using the pre-made fondant because we're not going to eat the characters, so it doesn't matter what they taste like. I was going to do them all in white and then paint them, but I thought that would be too meticulous for me, and I figured I wouldn't have to color large amounts of fondant, so I decided to just color the fondant for each one. I mean, it's not like I'm going to be coloring a whole pound of fondant one color; just little bits at a time. So last night I worked on the Tinman and got him finished. Keep in mind that these are supposed to look cartoonish. I mean they're essentially being made out of edible play-doh. It's kind of hard to make them look realistic. This is a short update, since the Tinman was not too difficult and there wasn't much work involved. For some reason all the pictures I took of him turned out fuzzy. I don't know why. Oh well. So that's it for this entry. Not too terribly exciting. I'm afraid that Dorothy and the Scarecrow are going to be the hardest. Not looking forward to those. Another update tomorrow. Ack! He has no arms! Don't worry, they'll be on there momentarily. White fondant with black food coloring not yet mixed in. I have a few stains on my fingers this morning, but nothing like when I did the Twilight cake.
-
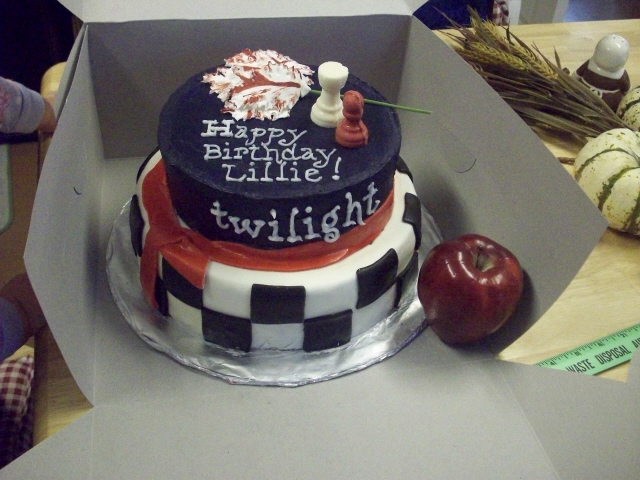
Thank you!! And yes, Lillie loved it! Now, a roller coaster cake, that's an idea I need to start working on! Maybe I can do one for my own birthday in March. Hmmmm... I'm going to buy all the stuff I need for the Wizard of Oz cake this weekend, so expect some updates next week when I get started on it.
-
Tee hee hee! Totally took this the wrong way! Ha ha...I guess I didn't think that one through!
-
Gosh, I'm flattered that you've taken such an interest in my cakes! I'll be starting on the Wizard of Oz cake next week so I'll have to change my thread title. Thanks again, everyone!
-
Thank you! On to the next!
-
Thank you! I was told by the birthday girl's mother that it was one of the best cakes she's ever tasted. That's a pretty good compliment!
-
Thank you!! I had fun doing it. Can't wait to get started on something else. I'm going to do a Wizard of Oz cake for my daughter's 3rd birthday in a couple of weeks.
-
You're welcome! I'm glad you liked it. Now you need to try it with different ice cream flavors!
-
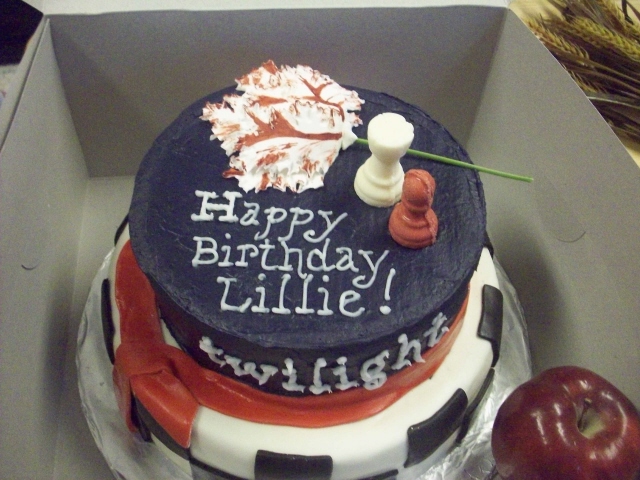
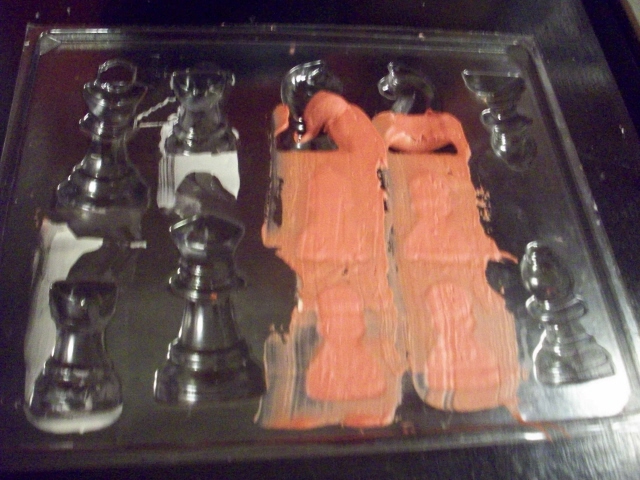
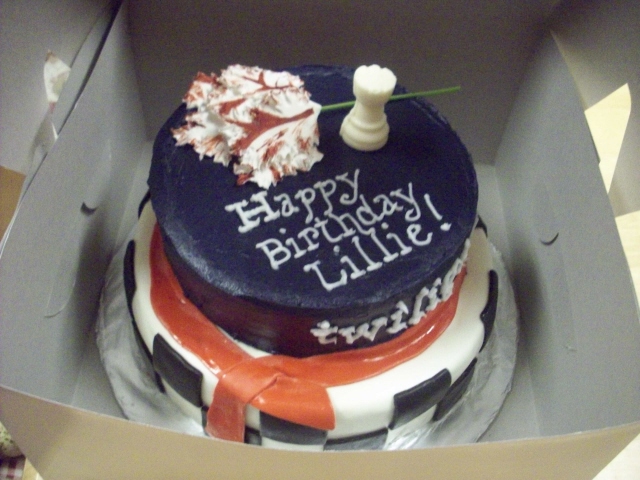
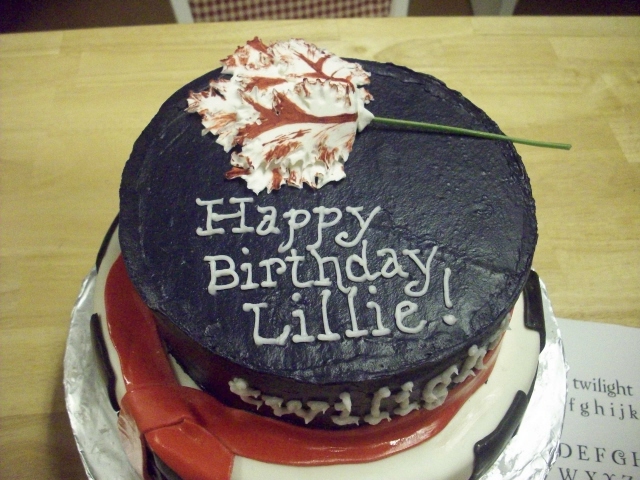
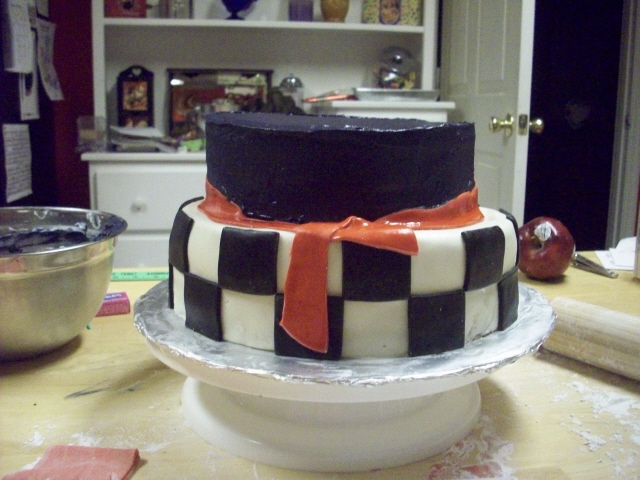
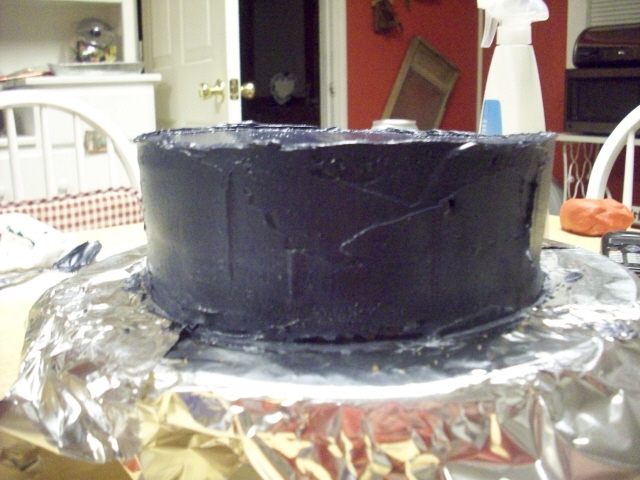
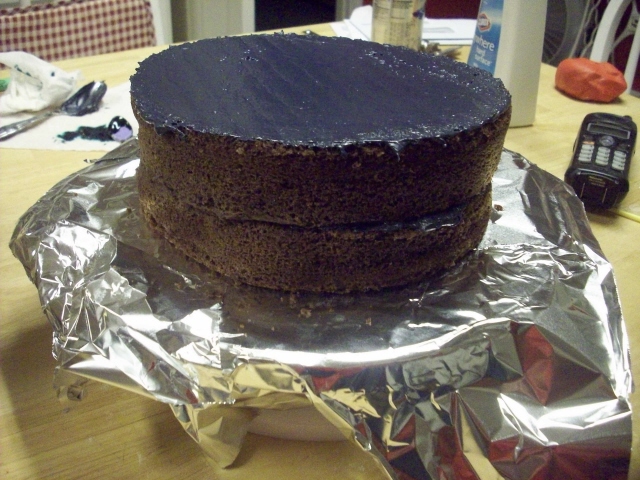
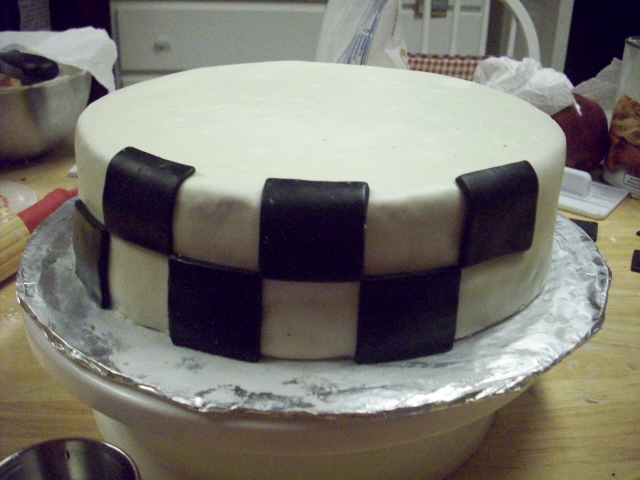
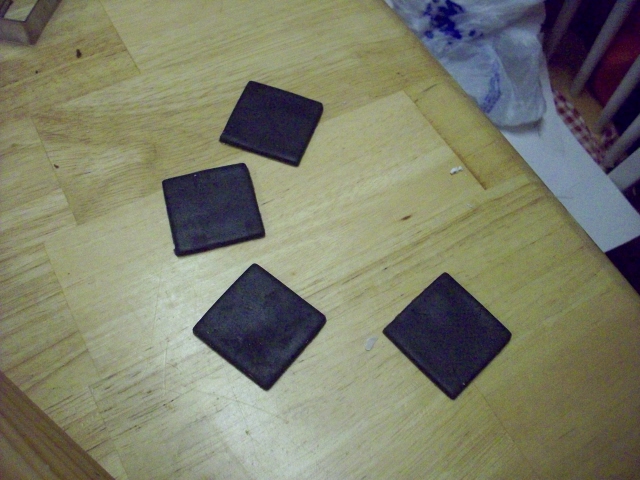
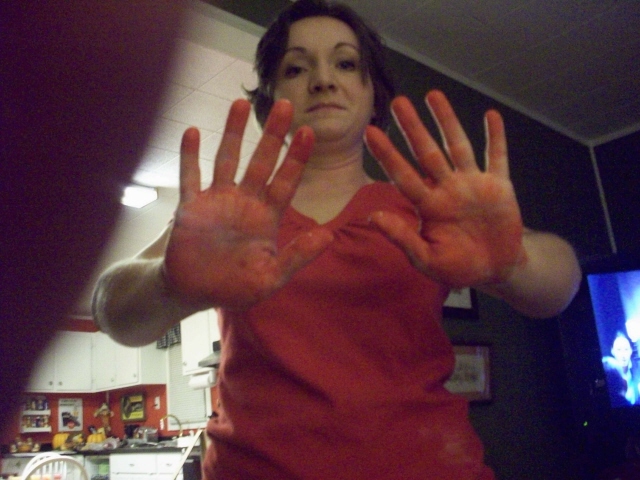
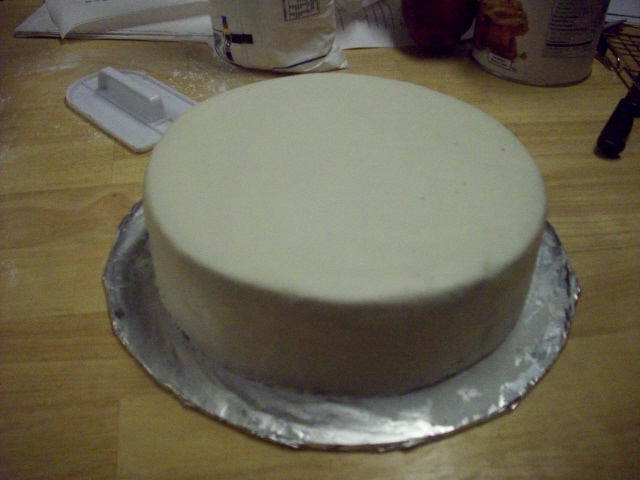
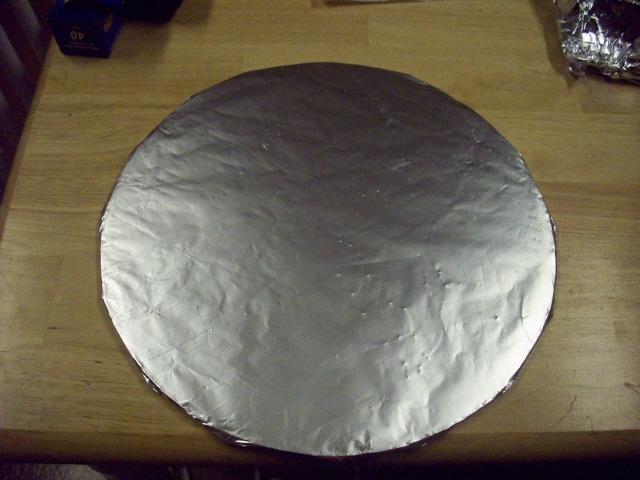
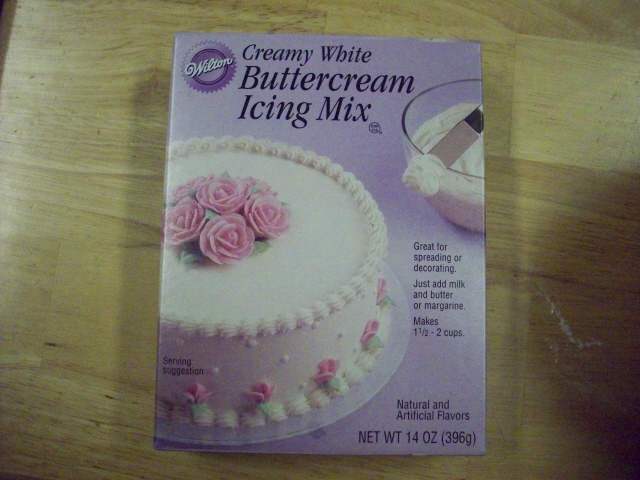
^ Thank you! Here's how it went: I told you I probably wouldn't get the last update on here until today. Busy weekend. So let's get right to it. Since I already posted about mixing and baking the first batch of cakes I'm going to skip rehashing that here. Instead we're going straight to icing. One more view. I am quite proud of how it turned out. The birthday girl loved it, so I'm told. And the chocolate cake recipe got rave reviews. Thanks for following the process! Hope you enjoyed it! Top view of the finished cake! I think it turned out very nicely. There it is! Still in the mold. The red one gave me fits. It kept breaking in the middle. I swear that was the hardest part of the whole cake! One chess piece on, but where's the red one? Writing on the top, and adding the flower. Notice my cheat sheet to the right of the cake! I found the twilight font style (Zephyr, by the way). Starting to assemble the whole thing. The red ribbon I made from the fondant I just colored. I just sort of draped the ribbon around. I hadn't intended on making it uniform or anything. Completely iced, but not quite smooth yet! Icing the top tier. I couldn't get the icing as dark as I wanted it. I had added so much coloring already, I was afraid if I added too much more it would make the icing taste bad. I got a deep midnight blue color, and it looked great anyway. Adding the squares to the cake. I just used a little bit of water and a brush to adhere the squares. Cut squares. I cut many more than that! Next I rolled out the black fondant and cut squares for the chess board on the bottom tier. And my hands, colored red. Hey, they match my shirt! Next, I colored the left over white fondant red for the ribbon. Looks kind of like a bleeding heart, huh? Ewww. I didn't take a picture of the completely iced bottom tier before I put the fondant on. But the above is the fondant-covered bottom tier. Looks pretty good! Second layer goes on. First layer gets a quick coat. Then... Before I iced, I wrapped the cake board with foil. The above is what is looks like all mixed up. I had to add a little more milk than it called for because it was too dry and thick. And I forget how much milk. I think maybe 3 Tbsp. We have to add 6 Tbsp. of softened butter. I know you're going to be disappointed in me for using a mix for the icing, since I made everything else from scratch. But it was more cost efficient. I found a great recipe for buttercream, but I didn't already have all the ingredients on hand, so it would have added a lot more cost than just buying the mix.
-
Ha ha...yes I baked the cake from scratch. And thanks! I hope I'm entertaining y'all. I may get the final update done tomorrow, but I'm not sure. We just got a new computer at home and I'm not too familiar with it yet, so I may not be able to figure out how to edit my pictures to size.
-
Baseball doesn't really interest me, so I'm not really a fan of one team or another. But your secret mission report was very entertaining!
-
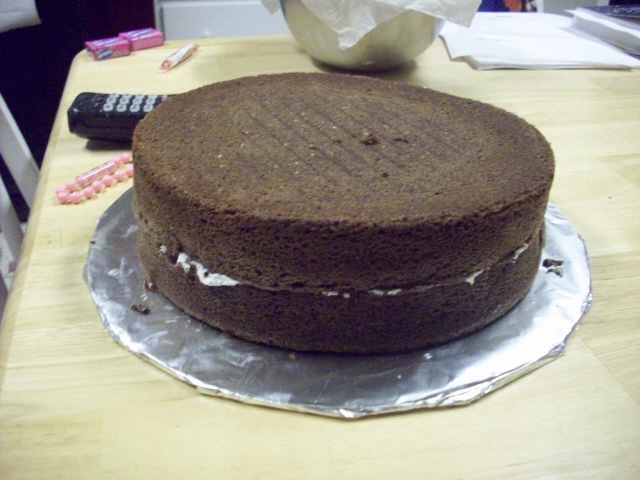
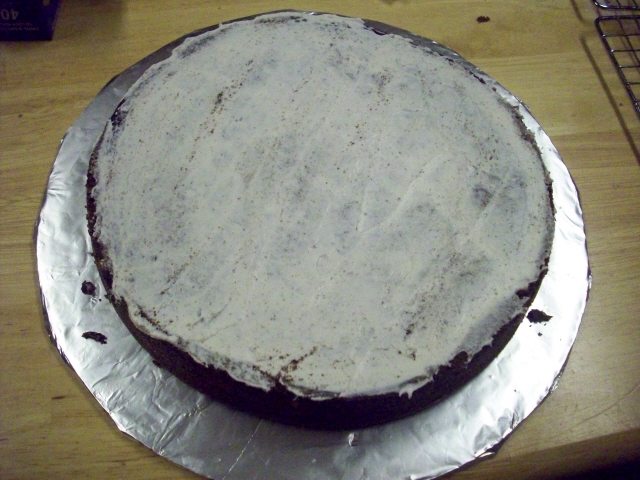
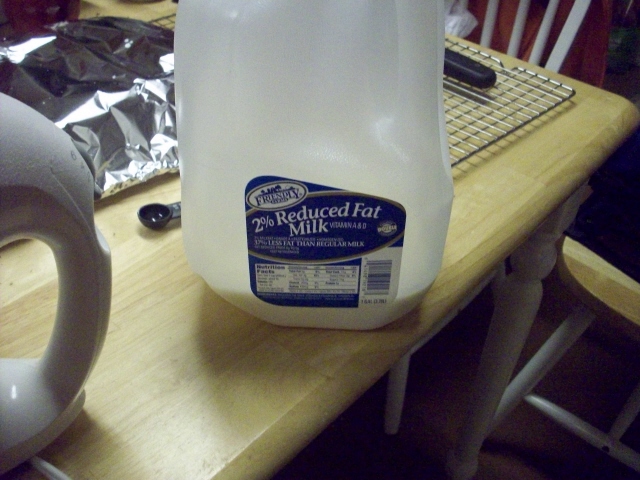
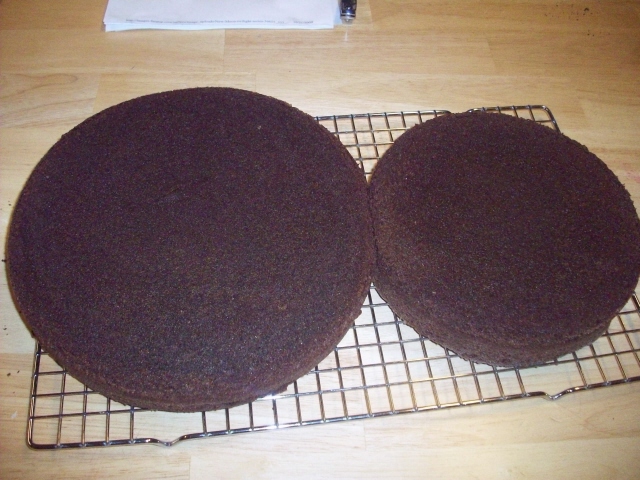
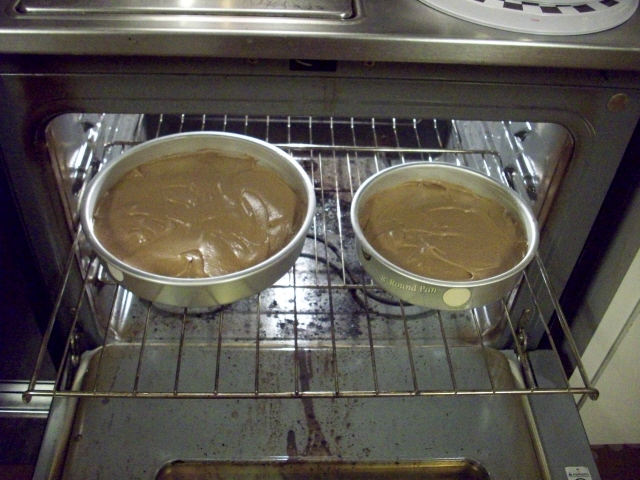
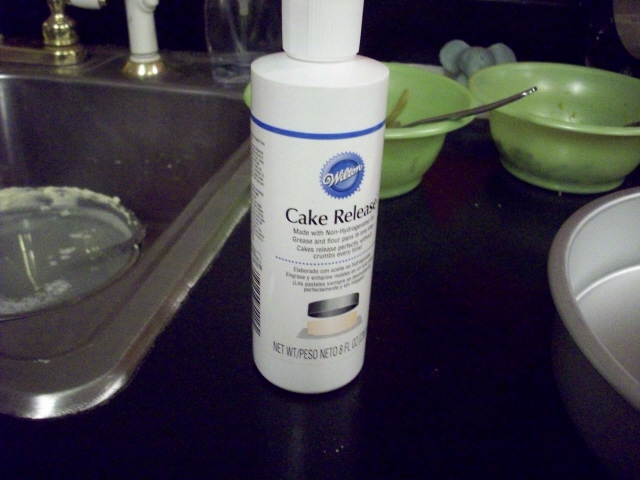
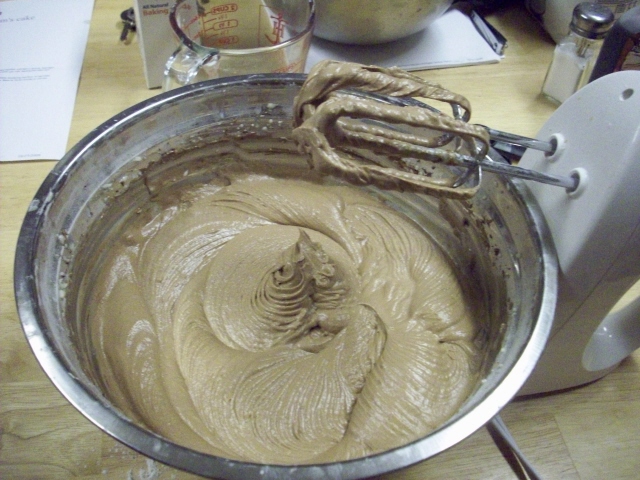
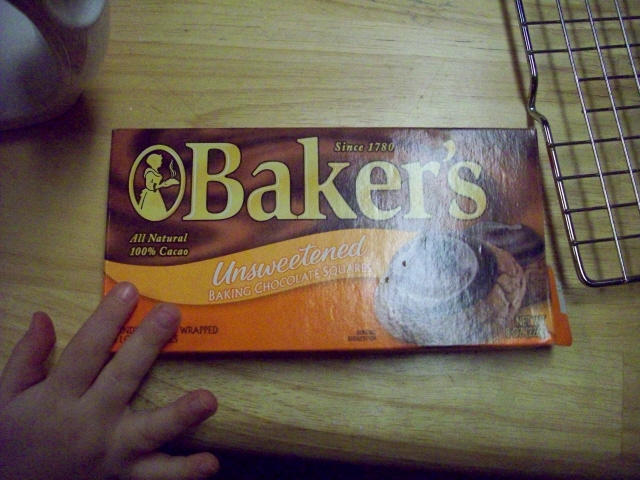
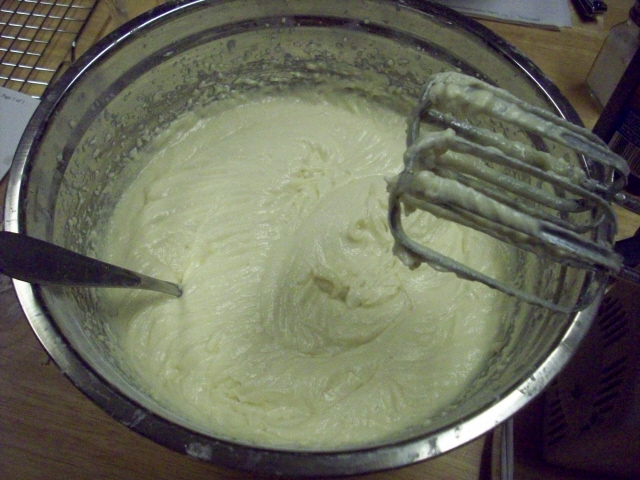
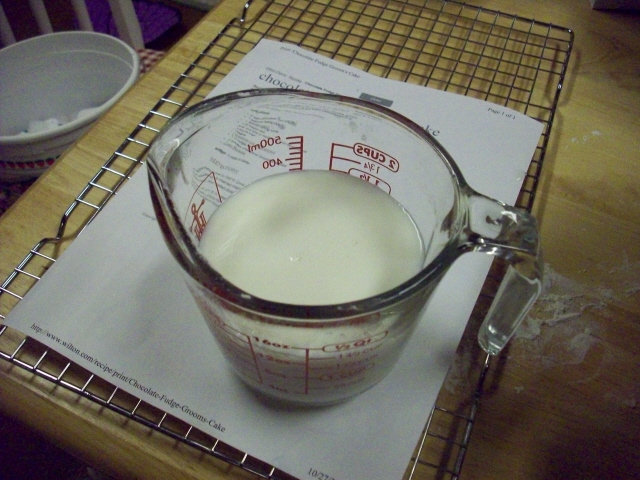
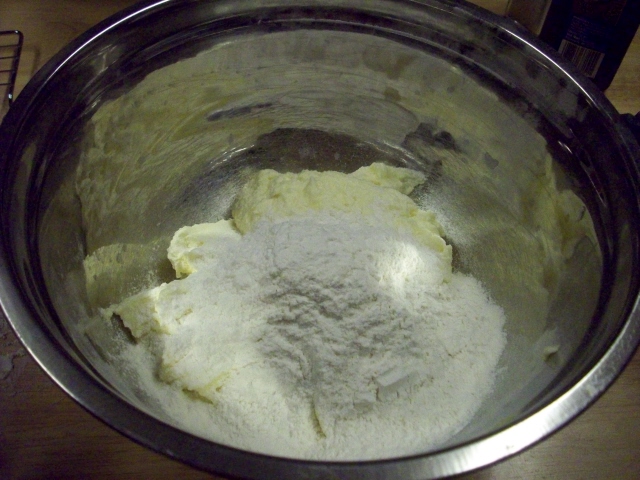
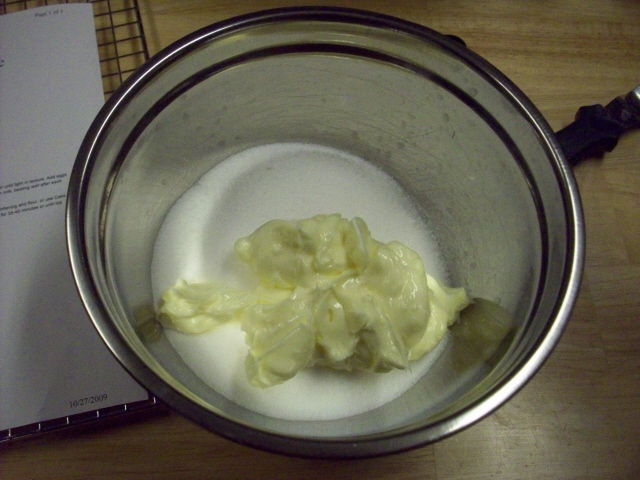
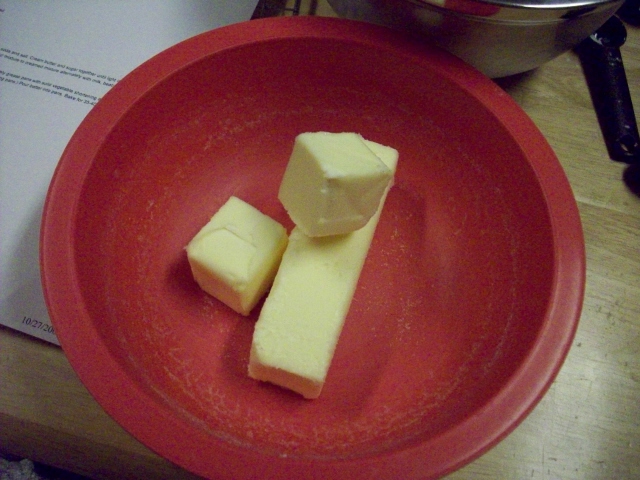
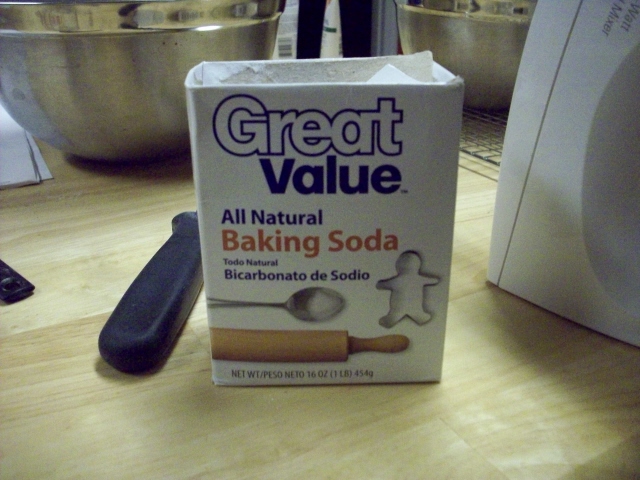
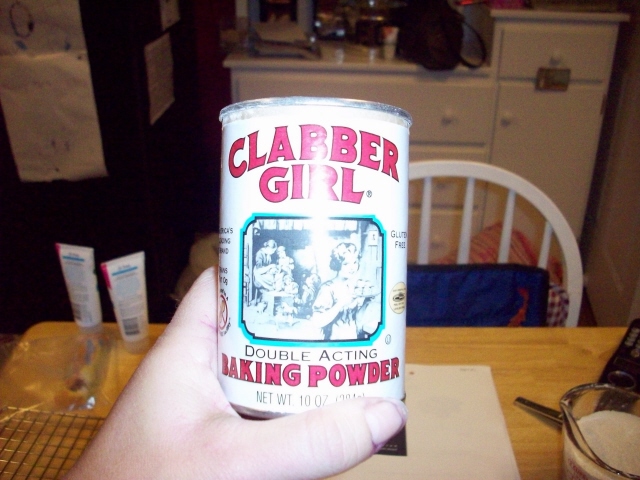
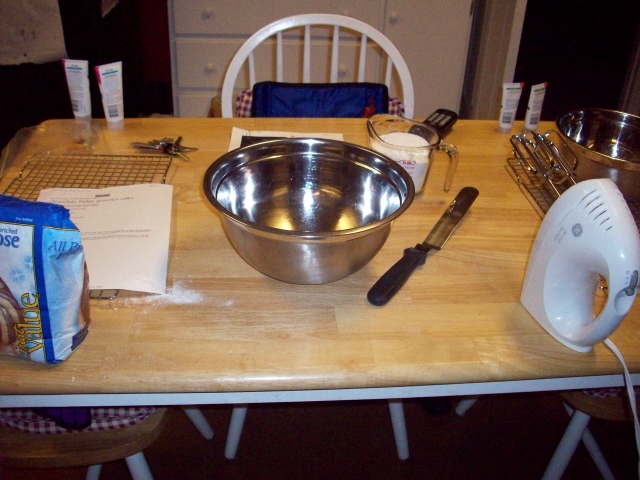
I didn't get as much accomplished last night as I had hoped I would. See, I had planned on getting the cakes baked and covered with fondant/iced last night, then doing the detail work tonight. Alas, it was not meant to be, for I discovered my shortage of butter. Yes, butter. I need to make two batches of cake batter, which calls for 3/4 cup of butter, and I needed butter for the BUTTERcream icing. I had just enough butter for one batch of cake batter. So that means I will be working my butt...er (har har) off tonight to get everything finished for my friend to pick up the cake tomorrow morning. No worries...it will be done! So anyway, onto baking the cake that I was able to get done last night. The birthday girl wanted a chocolate cake, so I found a recipe at Wilton. Chocolate fudge cake...yum! Let's get down to business, shall we? And finally, the finished cakes on the cooling rack. They smelled wonderful while they were baking. I hope they taste as good as they smelled! I'll finished up the whole cake tonight. I doubt I'll do an update this weekend, so you may have to wait until Monday to see the finished product. I'll know you'll just be so excited to see it come Monday morning. Ready for the oven! I made one 10-inch layer and one 8-inch layer last night. Tonight I'll make one more of each. Grease your pans. I use Wilton's Cake Release. It is awesome. The cakes come out of the pans so easily. Add the melted chocolate to your batter and beat thoroughly. Doesn't that look yummy? You'll need 3 oz. of unsweetened chocolate. My girls kept asking for some. I kept trying to explain that it wasn't very good by itself because it wasn't sweet yet. Notice Cammy's little chubby hand reaching for it! Melt your chocolate in the microwave at 30-second intervals, stirring between each. This is what it should look like at this point. Now it's time for chocolate! Then alternating between the two, add your flour mixture and 1 1/2 cups of milk, beating well between each addition. Cream together your butter and 2 cups of sugar until it's light in texture. Then add 3 eggs, and 1 teaspoon of vanilla and beat thoroughly. In a separate bowl soften your butter (3/4 cup), if it's not already at room temperature (mine wasn't). One teaspoon of baking soda. And a half a teaspoon of salt, which I didn't take a picture of. Combine the four together in a bowl. One teaspoon of baking powder. First, 2 cups of all-purpose flour. Everything laid out and ready to go!
-
Ha ha, thanks! Have to do something to keep people entertained during the off season. Actually I did get my camera dirty! Not with the purple, though. My husband was perturbed that I was handling the camera with shortening and sugar all over my hands. But no worries, I cleaned it all off.
-
Monkey's Alton Towers Scarefest TR
Brandy524 replied to RedSpecial's topic in Theme Parks, Roller Coasters, & Donkeys!
Those pictures are too cute! Very creative report. Good job! -
This kind tastes much better! I mean, really, it's just marshmallows and confectioner's sugar, that has to taste good! My husband has never liked the taste of fondant either, until the first time I made this. I've swayed him to fondant now.