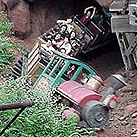
Coupon Posted July 9, 2011 Share Posted July 9, 2011 (edited) Welcome to Coupon's Custom Ride Tutorial Thread!! For all the rides that I will make a tutorial for, you will need the following: -Roller Coaster Tycoon 2 - 8 Cars Trainer (The one with Version on the display bar) - Son Of Beast Trainer (SOB) Note: Custom Scenery isnt required, but is recommended. Now. In order to begin, you need to make a 3x3 colored ground square to help guide you. ^3x3^ Step 2: On 8 Cars, select "8 Cars per Train" in order to get one lone car. Step 3. On the Son of Beast Trainer, under the "Scenery" tab, click "Begin Special Build Mode". Step 4: To get the horizontal cars (The ones that aren't diagonal), build a Inverted Coaster and put the station away from where the car is going to be, as the car is going to end up going backwards into position. Step 5: Open 8 cars, edit the coaster you just made, and make the mode it runs at to "Downward Launch." Step 6: Open the coaster then close it as fast as you can. Step 7: Open SOB Trainer, and under scenery select "Execute Special Build Mode" then select "Sink Scenery." After you check the car in game, go back to SOB and select "End Special Build Mode." The result is this: (Minus the scenery) Step 8: Repeat Step 2-7 3 more times to complete the horizontal "X." Result is this: Now, diagonal cars are a little more complicated, but not by much. Step 9: Begin Special Build Mode from the SOB Trainer. Step 10: Build the track this way, with station facing away from car again: Step 11: Repeat Steps 5 to 8 four times to complete the ring. Result: Step 12: Add Monorail track to connect the cars "together" Step 13: Add a Connecter Pole that will attach to the "frame of the ride. Result: Step 14:Build the frame of the ride. (Part that holds the ride together, the 4 yellow poles in my picture.) Step 15: Add any detils such as a queue to your ride. Result: Enjoy you're new ride as it is complete! Please note, DO NOT right click near the Fireball/Afterburner. It WILL ruin you're ride. Hope you liked this tutorial!! Next tutorial: Intamin First Generation Freefall Edited October 21, 2012 by Coupon Link to comment Share on other sites More sharing options...
Pacificoaster Posted July 9, 2011 Share Posted July 9, 2011 Great tutorial Coupon, however I believe the end result with theming is a bit sub par. The queue hut is a bit tall and the fence around the front of the ride is a bit awkward. To get a gradual curve, try using the MOM menu in 8cars to create a fence using two steeplechase tracks stacked on top of each other. Link to comment Share on other sites More sharing options...
sfgamguy Posted July 9, 2011 Share Posted July 9, 2011 This is great! May I place a request? If you could do a tutorial for a Calypso or a Himalaya that would be amazing. Link to comment Share on other sites More sharing options...
Coupon Posted July 9, 2011 Author Share Posted July 9, 2011 Great tutorial Coupon, however I believe the end result with theming is a bit sub par. The queue hut is a bit tall and the fence around the front of the ride is a bit awkward. To get a gradual curve, try using the MOM menu in 8cars to create a fence using two steeplechase tracks stacked on top of each other. It was a example, and its still a WIP. But thanks! This is great! May I place a request? If you could do a tutorial for a Calypso or a Himalaya that would be amazing. Hopefully I will. Thanks! Link to comment Share on other sites More sharing options...
CoasterCreator9 Posted July 9, 2011 Share Posted July 9, 2011 I've always wondered how you guys did that. It wil be nice to have a 1st gen tutorial here, as the only other one I can think of is hard to find. Link to comment Share on other sites More sharing options...
PSiRockin Posted July 9, 2011 Share Posted July 9, 2011 That's pretty cool. Doesn't seem too complicated, and the end result is pretty realistic looking and to scale. I'll make sure to save this. Link to comment Share on other sites More sharing options...
braztaz Posted July 12, 2011 Share Posted July 12, 2011 Love this. If only I didn't have a Vista. Link to comment Share on other sites More sharing options...
Insanity Posted July 19, 2011 Share Posted July 19, 2011 thanks! with this i finished my first custom top-spin! Link to comment Share on other sites More sharing options...

Recommended Posts
Create an account or sign in to comment
You need to be a member in order to leave a comment
Create an account
Sign up for a new account in our community. It's easy!
Register a new accountSign in
Already have an account? Sign in here.
Sign In Now